We may earn money or products from the companies mentioned in this post.
A radiator’s primary function is to provide heat in a room. However, most of the time they are quite unsightly. Not to worry though, you can easily hide those ugly radiators by building your own DIY radiator covers. Learn how to build a radiator cover in this step by step tutorial.
Hey Guys! Today we are going to be using some power tools to build a radiator cover.
I grew up in a home with forced air heat, then I purchased my first home and that too had forced air heat. Fast forward to my current home, I now have radiators.
Personally, I much prefer the radiant heat over the forced air. I find that my home stays at a pretty consistent temperature. That being said the radiators are not the most pleasant looking things.
After 6 years of staring at these ugly radiators, I finally had enough and decided it was time to build radiator covers.
Before we get started, I have a few quick notes about what I’ll be doing.
I am building a free-standing radiator cover. This means it will not be secure to the wall or anything. Additionally, the cover will not have a back. I’m building it so it can easily slip on and off the radiator. It will be like a piece of furniture.
HOW TO MEASURE YOUR RADIATORS
First things first, get your measurements for the radiator covers. Start by measuring the height, depth, and width of the radiator.
Measure the height from the floor to the top of the radiator, the width (don’t forget the valve or water pipes going through the floor, and the depth from the baseboard to the front.
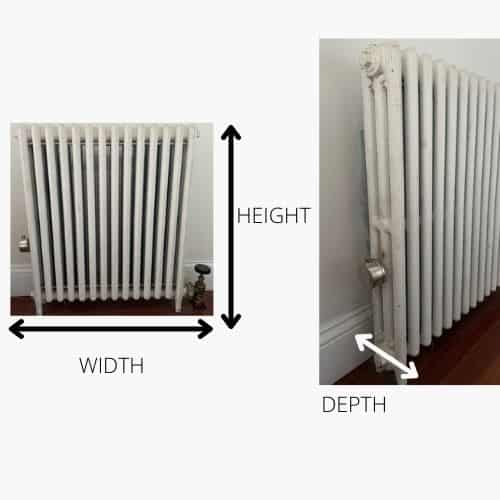
Once you have your radiator measurements, you’ll want to add 1 inch to the height well as the width, and a 1/2 inch to the depth.
We are adding to the measurement because the radiator cover needs to have a little bit of breathing room.
Having all the measurements lets you know how much wood you’ll need to buy in order to build your DIY radiator.
HOW TO BUILD A RADIATOR COVER
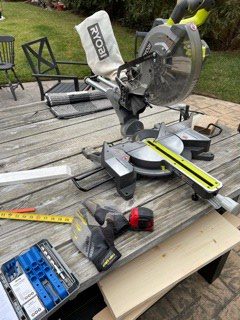
After you have found the dimensions of your radiator next step is to gather all the supplies you’ll need to complete this project.
I find that having everything your need at your fingertips makes the projects go a bit more smoothly. If you don’t have all your supplies, you’ll be constantly stopping and running to find what you need. Trust me, time the time to set up a workspace with everything you’ll need. It will make your life so much easier.
DIY RADIATOR COVER SUPPLY LIST
- Drill – I use the Dewalt Cordless Drill
- Kreg Pocket Hole Jig
- Kreg screws – I have the Kreg Pocket Hole Screw Kit
- Clamps
- Miter saw – I use the Ryobi Sliding Compound Miter Saw
- Nail gun – I use the Ryobi Cordless Nailer
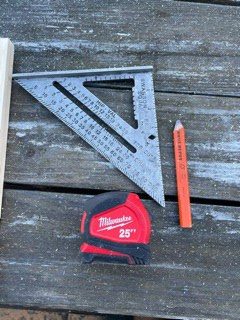
- Speed square
- Pencil
- Tape measure
- Wood glue
- Wood filler
- Sandpaper
- paint
LUMBER FOR DIY RADIATOR COVER
- 1×4
- 1×8
- 1×10
- 1×1
DIY RADIATOR STEP BY STEP TUTORIAL
The steps below are how I made my radiator covers.
MEASURE AND CUT WOOD PIECES
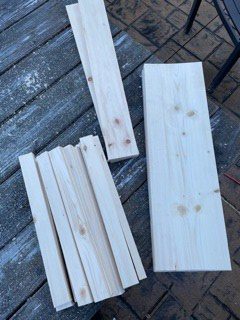
First things first, you need to cut the wood to the measurements you took earlier. I find that cutting all your pieces will help the assembly process go much more smoothly.
REMEMBER: Measure twice, cut once!
For the front panel, my measuresment were
MAKE YOUR POCKET HOLES WITH THE KREG JIG
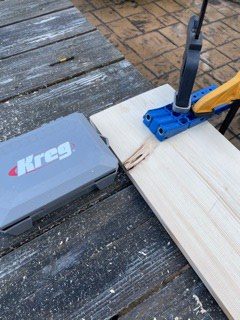
Once all the peices were cut I layed out the front panel. I marked out where the pocket holes would go before drilling anything. I’m a planner, I like to know what’s coming.
I made 2 pocket holes on both sides of the top and the bottom peices of the front panel. I also made six pocket holes on both the side panels.
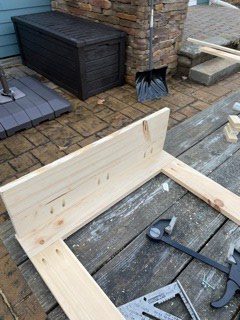
ASSEMBLE THE RADIATOR FRONT PANEL
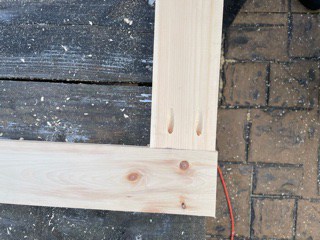

Now that the pocket holes are all drilled it is time to assemble the front panel.
Screw the top and the bottom pieces into the 2 side panel pieces. I suggest using a clamp, speed square, and wood glue to ensure everything is perfectly secure and square.
ATTACH THE SIDE PANELS TO THE FRONT PANEL
Once you have the front panel of the radiator cover assembled, you want to attach the side panels to it.
My radiators are on the smaller side so I was able to use 1×8’s for my 2 side panels. If you have a larger radiator, you’ll want to replicate the front panel at teh measurement of the sides.
For this step, you may want an extra set of hands to help you hold the boards steady so you can easily screw the boards together.
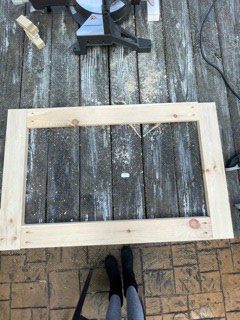
ATTACH THE SPINDLES TO THE FRONT PANEL
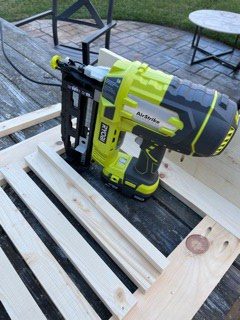
After the radiator side panels are in place, you can start attaching the 1×1 spindles to the front panel of the radiator cover.
For the spacing, I used an extra 1×1 as my spaces and it worked out perfectly.
A quick disclaimer, I’m not a math person so I wasn’t about to try and figure out the spindle spacing perfectly. I figured if it looks to my eye that works for me. I mean I’m the one that is going to be looking at this thing. You know what I mean?
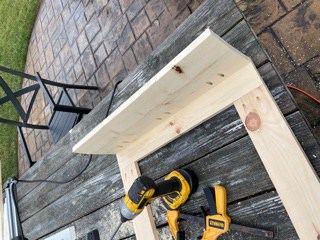
ATTACH THE TOP
After I had the base of the radiator cover assembled, I did a dry fit on the radiator.
I took the top piece and set it in place to where I wanted it then marked it. From there I removed the top and took some wood glue and put a small bead around the edges of the base. I then placed the top back to where I had marked and used my nail gun to secure it in place.
FILL HOLES AND IMPERFECTIONS
SAND
PRIME AND PAINT
HOW TO BUILD YOUR OWN RADIATOR COVER TIPS
I have a few tips I have to share after building a few of these radiator covers.
- ALWAYS measure everything before cutting.
- Make sure you have all your supplies and tools readily available.
- When measuring your radiators, don’t forget to account for the valve or water pipes that are in the floor.